")
MCT-320 SMA is a fully supervised, compact Zigbee door/window contact transmitter, designed primarily for protecting doors and windows. Suitable for any residential or commercial environment this low-profile transmitter gives the added advantage of a particularly small size that allows for highly flexible and virtually invisible installation. The MCT-320 SMA boasts impressive wireless range, while maintaining a long battery life.
Specifications Installation Pairing Resetting
Features and Specifications
- Very small, almost invisible design
- Highly cost-effective for low-profile installations
- Fully supervised
- Double tamper protection (cover and wall)
- Long-life standard lithium battery included
- Low battery indication transmission
Technical Specs
- Battery Type: CR2, 3V
- Battery Life: 7.3 years
- Dimension: 2 x 1.18 x 0.81 in
- Operating Temperature: Exterior: 14°F to 131°F
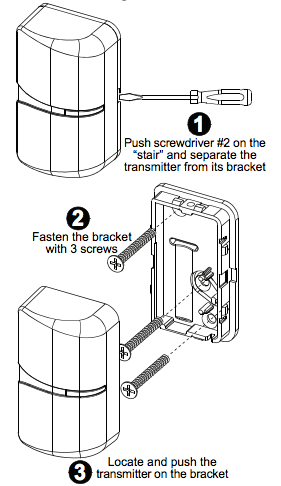
Installation
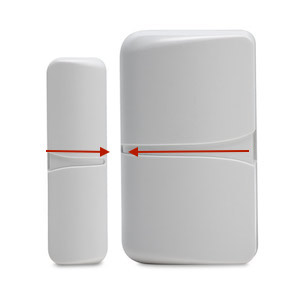
IMPORTANT – When installing the Door/Window Sensor, remember to align the narrow end of the arrows pointing at each other.
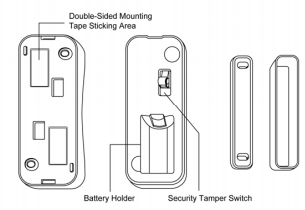
1) The transmitter (large part of the sensor) should be mounted on the fixed surface (e.g. door frame) and the magnet (small part of the sensor) on the moving surface (e.g. door). Use double sided tape or screws to secure the sensor.
2) Fasten the spacer to mounting surface with 2 screws or double sided tape. Place the magnet on the spacer in the correct direction and slide it until it is secure.
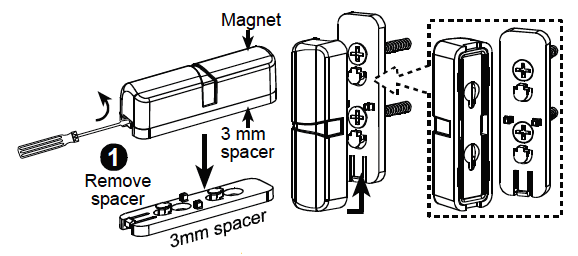
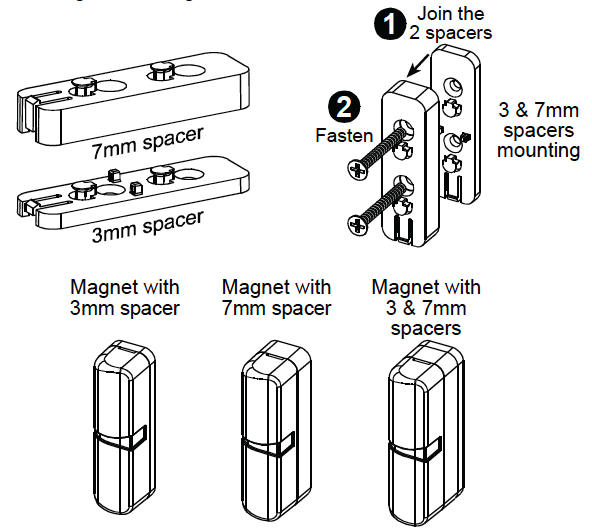
3) Optional spacer(s), 3 mm width, 7mm with, or both, can be used for the magnet mounting.
Pairing
Sensors can be added to your system during activation, or at a later time. If you want to add a sensor that was not included with the original Touchstone package, make sure your service provider supports it.
Note: If you are attempting to pair a sensor that has been previously deleted from the Hub, it will be necessary to default the sensor.
To add a sensor, click SETTINGS on the toolbar to display the Settings page. The number in the upper right hand corner of each icon indicates how many instances of that type of device have been installed already.
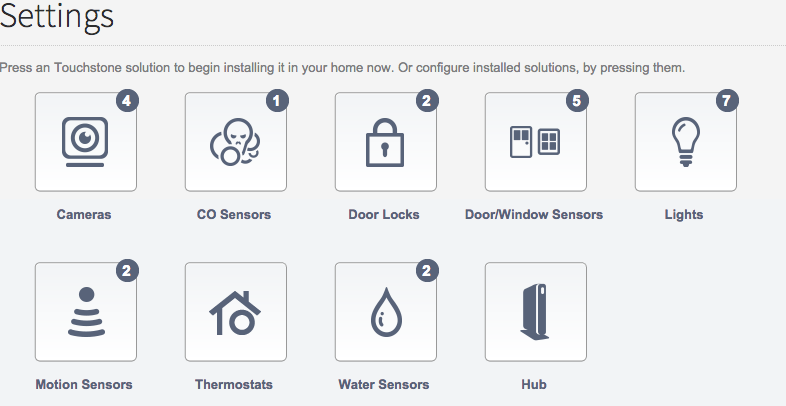
Click the type of sensor you want to add(i.e. door/winow, motion, etc) to display the sensor’s settings.
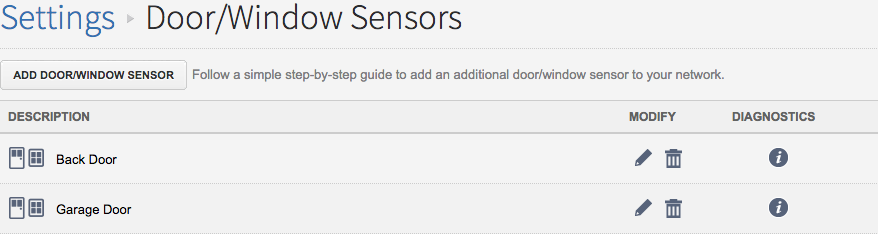
Click Add Door/Window Sensor(or whichever type of sensor you are attempting to add) and follow the on screen prompts.
Resetting
To default the slimline door/window sensor:
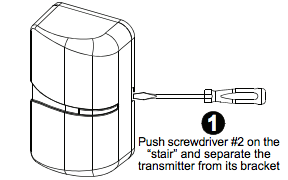
1) Remove the cover using a small flathead screwdriver.
2) Remove the battery; press and hold down the tamper switch(small black button near battery).
3) With the tamper switch still held down, insert the battery and release the tamper switch.
4) The LED will begin to flash once the sensor is defaulted to signal that is ready to be added to your system. Click Here for a guide to adding sensors.