Your HUB is the brain of your new system. It’s the device that controls everything. All of your Lifestyle Devices(Cameras, Lighting, and Thermostats), as well as your sensors talk directly to the HUB. The HUB is responsible for taking the information relayed to it from your devices and getting that information to you. The HUB relies on a solid broadband connection in order to function properly and therefor, a good connection is the first step in your activation process.
1) When you opened your box, the HUB was probably the first thing that caught your eye. The HUB comes in two parts. The first part is the main body of the device itself, the second part is the stand. If you want to mount your HUB on a wall, the stand can be stored for later, if you want your HUB to stand on a table top, simply insert the stand into the bottom of the HUB.
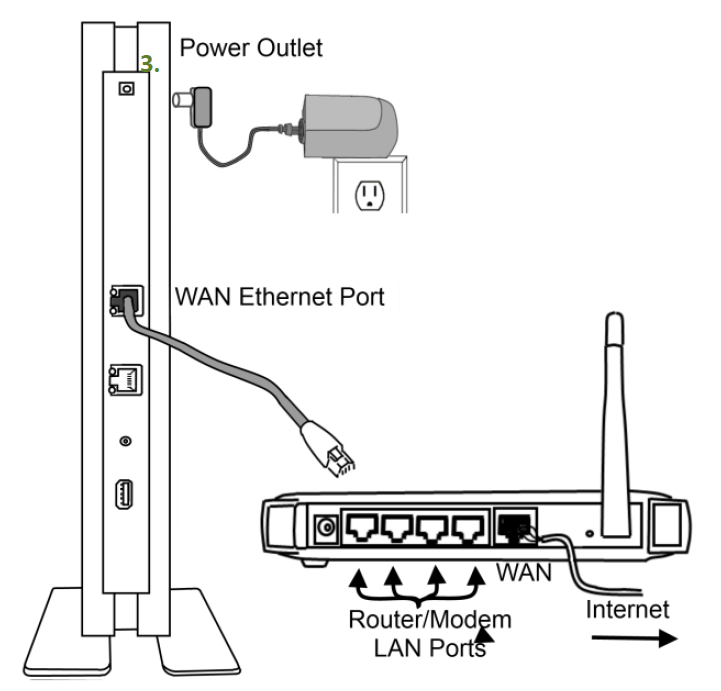
2) Step 2 is making all of the connections. Your kit came with an Ethernet cable and a power cable for your HUB. Locate these cables and make the connections as follows.
A) Connect one end of the Ethernet cable to the WAN port on your HUB, and the other end to and available LAN port on your home router or modem.
B) Connect the power adapter to the HUB, and plug the other end into a wall outlet.
Once all of your connections are made, your hub should begin to light up. When the power LED (bottom) turns green and the connectivity led (2nd from bottom) begins to flash amber(yellowish/orange), you’re ready to begin the activation process(Click HERE for a diagram of the hub LEDs). If your hub does not light up correctly, confirm that you have a good broadband connection.
Once the LEDs on your hub are lit properly, refer to the email you received with your temporary username and password on it. Click the URL link on that email, and use the temporary credentials provided, to log into your ReadyHome Lite system and activate your system.