")
Clip-SMA is the industry’s smallest and most elegant wireless curtain-type PIR detector designed for the protection of doors, windows and all-glass walls. Clip-SMA creates a protective curtain enabling complete coverage for properties with large or subdivided windows, doors and all-glass walls. Clip-SMA provides full perimeter protection while allowing consumers to normally and freely use the premises without triggering a false alarm. Clip-SMA uses advanced patented digital FM signal processing, as well as the well-known patented TMR™ algorithm to enable three different detection modes (2m, 4m, 6m) in a single detector, each programmable for optimal performance with the unit’s specific application. Advanced motion analysis enables Clip-SMA to distinguish human motion from other disturbances for the most accurate detection and the fewest false alarms.
Specifications Installation Pairing Resetting
Features and Specifications
- A fully-supervised wireless curtain-type detector with anti-collision
- PowerCode technology
- Compatibility with members of the PowerMax family and all Visonic PowerCode wireless panels and receivers
- Fast and easy installation
- Digital FM technology incorporating an advanced selector (2m, 4m and 6m) for optimized detection and false alarm processing
- Ultimate false alarm elimination via patented TMR algorithm
- 3-volt long-life high power standard lithium battery
- Attractive, sleek design suitable for any home or office
- Several optional frequencies available in compliance with international standards
- Clip-SMA T model is offered with back tamper
Technical Specs
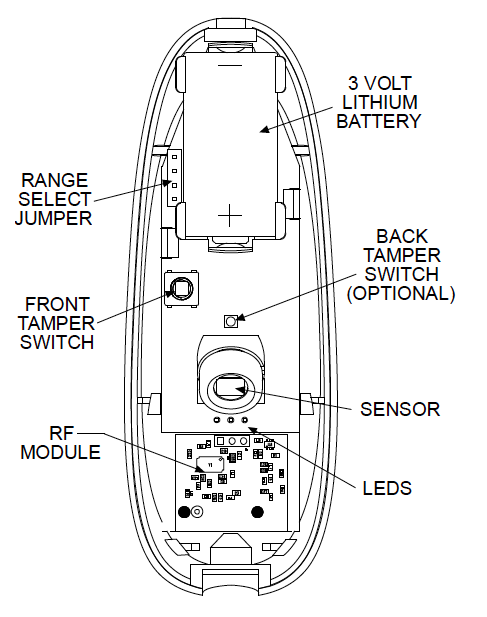
- Battery Type: CR123A, 3V
- Battery Life: 2.3 years
- Dimension: 4.13 x 1.38 x 1.19 in
- Operating Temperature: Exterior: 14°F to 122°F
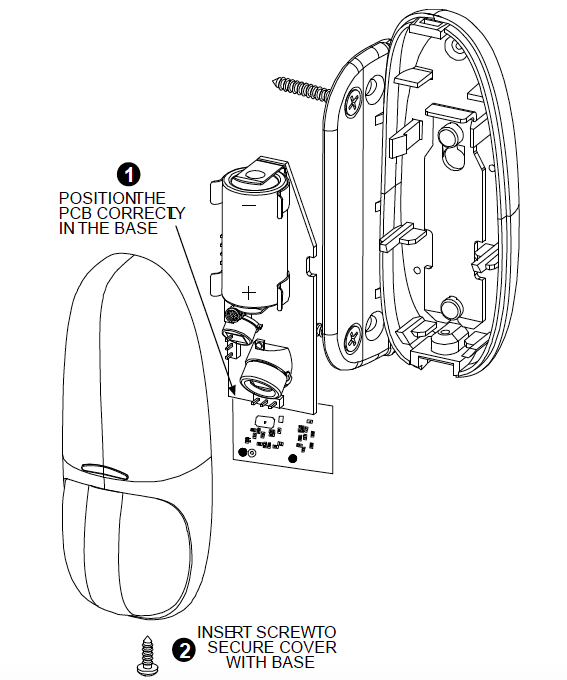
Installation
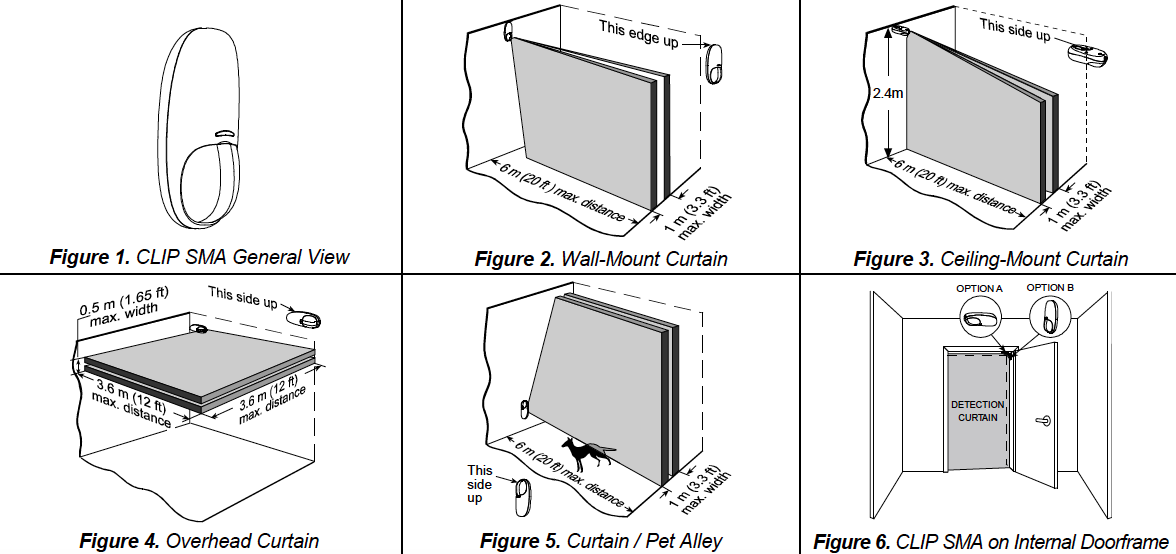
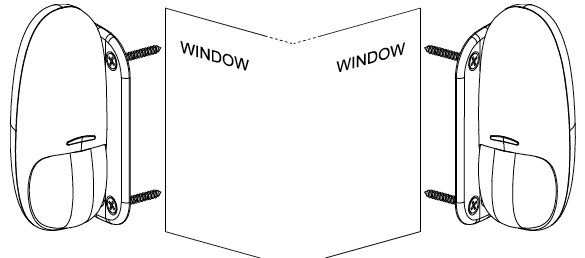
CLIP Applications
General Guidance for Installation

Installation Procedures
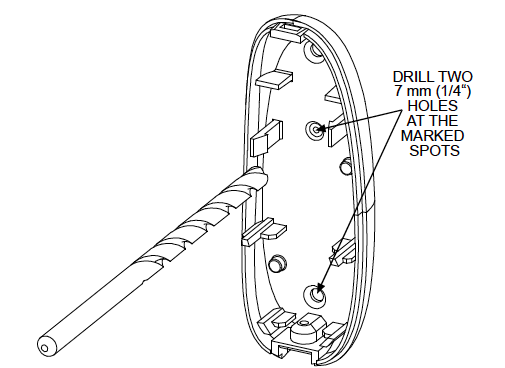
Regular Mounting

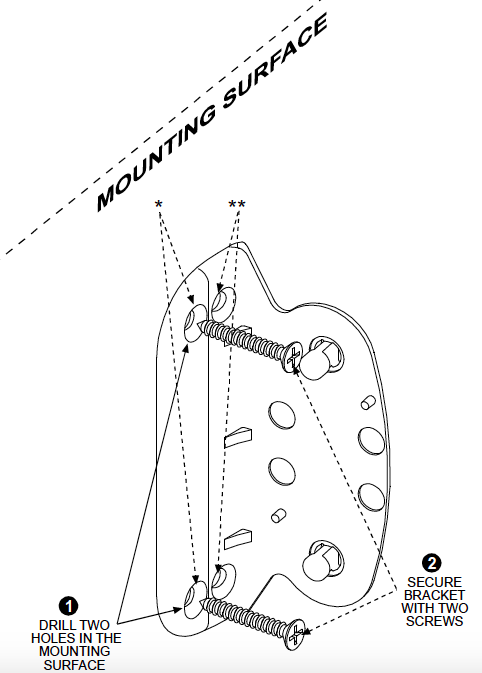
Bracket Mounting

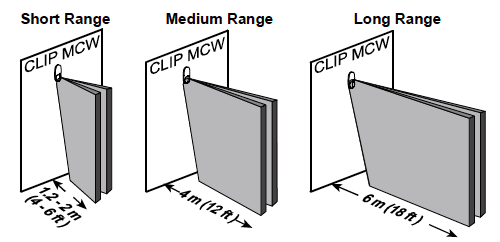
Setting the Coverage and Range
A 4-pin jumper is used to select 3 ranges, according to the type of installation, for the curtain beams.
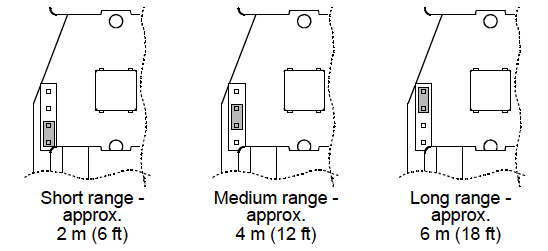
The purpose of the range setting is to ensure optimal signal processing and high immunity against false alarms. Mount the range jumper in the desired position and make sure that the protected area is within the selected coverage range. Carry out a walk test to verify proper performance.
Walk Test
- Mount the cover and tighten the screw. Wait for the detector to stabilize (the LED stops flashing approx. two minutes after the cover is closed).
- Walk slowly across the far end of the curtain pattern (in opposite directions). The LED indicator lights for approx. 3 seconds whenever you enter or exit a curtain beam.
Important: Perform walk test at least once a week to assure proper function of the detector.
Note: After closing the cover the detector enters a 15 minute walk-test mode. In this mode the LED will flash each time a detection occurs, regardless of LED jumper settings, and the detector will transmit on the occurrence of each detection event.
Pairing
Sensors can be added to your system during activation, or at a later time. If you want to add a sensor that was not included with the original Touchstone package, make sure your service provider supports it.
Note: If you are attempting to pair a sensor that has been previously deleted from the Hub, it will be necessary to default the sensor.
To add a sensor, click SETTINGS on the toolbar to display the Settings page. The number in the upper right hand corner of each icon indicates how many instances of that type of device have been installed already.
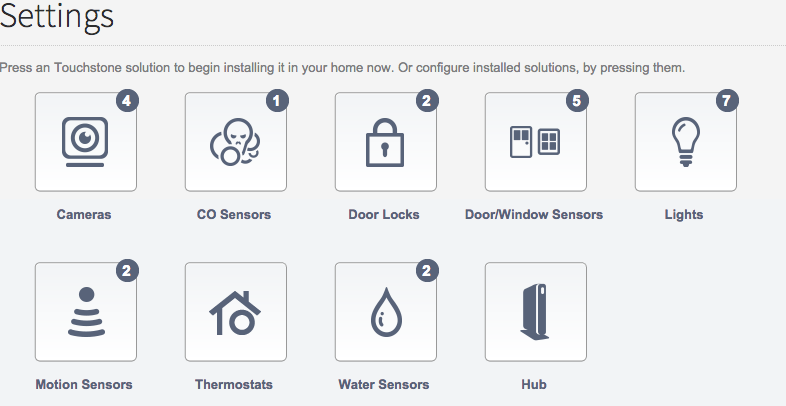
Click the type of sensor you want to add(i.e. door/winow, motion, etc) to display the sensor’s settings.
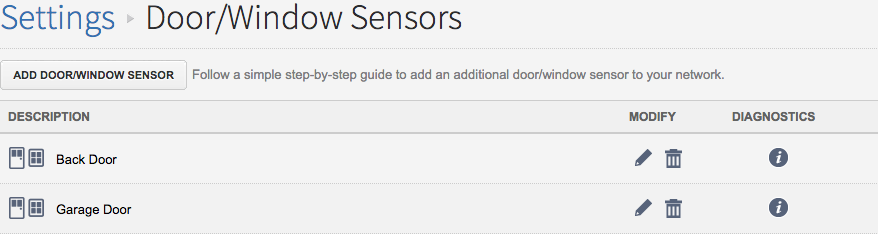
Click Add Door/Window Sensor(or whichever type of sensor you are attempting to add) and follow the on screen prompts.
Resetting
To default the CLIP Motion Sensor, remove the cover by loosening the screw at the bottom of the unit to expose the circuit board and battery.
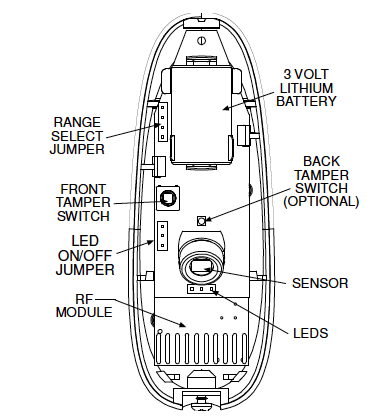
Remove the battery and press and hold the tamper spring. With the tamper spring held down, insert the battery, immediately release the tamper spring, and press and release the tamper spring again.
The small green LED will begin to flash to signal that the device is ready to be added to your system.