1. Slide the alarm body off of the mounting plate to open the sensor. 2. Remove one of the batteries. 3. Remove the front cover by gently pressing clips on the side of the sensor. Exercise care not to break the clips. 4. Press the tamper switch on the module…
Installing the Carbon Monoxide Sensor (SMCCO02-Z)
Mounting Guidelines Mount the CO sensors in or near bedrooms and living areas. We recommend you install a detector on each level of your home. When choosing installation locations, be sure you can hear the sensor from all sleeping areas. If you install only one sensor in your home, install…
SMC CO Sensor (SMCCO02-Z)
Carbon Monoxide (CO) is an odorless, tasteless, and colorless gas that kills in minutes. The SMCCO02-Z provides early detection against the silent threat of CO poisoning by providing visual and audio alarms when potentially dangerous CO levels exist. The alarm resets automatically when CO is no longer detected. In addition…
Defaulting the SMC CO Sensor (SMCCO02-Z)
Slide the alarm body off of the mounting plate to open the sensor Remove one of the batteries. Remove the front cover by gently pressing the clips on the side of the sensor. Exercise care to not break the clips. Press the tamper switch on the RF module inside…

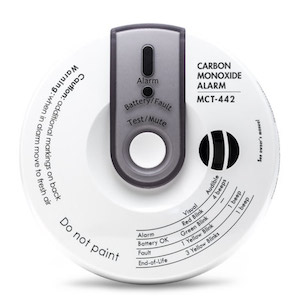
Visonic Carbon Monoxide Alarm (MCT-442 SMA)
**NOTE: A Manufacturer’s recall has been issued for this device. In rare cases, when the TEST button is pressed, the detector will show ALARM and stop functioning. It is highly recommended that these devices not be used for CO gas detection.** MCT-442 SMA wireless Carbon Monoxide (CO) detector gives early…
Installing the Carbon Monoxide Sensor (MCT-442)
Mounting and Installing The sensor can be mounted on a wall or ceiling. For EN approved sites, only ceiling installation is allowed. It must be mounted with its bracket (when it is attached to its bracket the tamper switch is pressed and the sensor automatic reset is performed). 1) Locate the bracket on…
Defaulting the Visonic Carbon Monoxide Alarm (MCT-442 SMA)
Hold down the tamper switch on the bottom of the device. Insert the battery into the sensor. Wait for the RF module’s green LED to light. In order to see the green LED on the circuit board, the cover must be separated from the housing (to expose the circuit board)…
Deleting/Modifying a Sensor
When you delete a sensor, Touchstone disables any rules that reference the sensor. To delete a sensor, click SETTINGS on the toolbar to display the settings page. Click the type of sensor that you would like to delete to display the sensor’s settings page. Click the icon next to the…
Adding a Sensor
Sensors can be added to your system during activation, or at a later time. If you want to add a sensor that was not included with the original Touchstone package, make sure your service provider supports it. Note: If you are attempting to pair a sensor that has been previously deleted…