
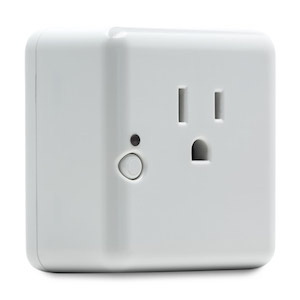
CentraLite’s Azela Lamp Module has all the features you would expect in an advanced plug-in module. Equipped with high quality electronics, these devices are built tough to last. The Lamp Module comes equipped with a power amplifier for extended range, current sensing technology (for energy management), and a pass-through electrical outlet. The Azela Lamp Module is rated up to 300W and supports incandescent, halogen, dimmable LED, and dimmable CFL light bulbs.
Specifications Installation Pairing Resetting
Features and Specifications
- Zigbee communication protocol for interoperability with other Zigbee devices
- Button for system capture and manual operation
- LED for load status and configuration
- Power-failure memory
- Rated for 12A at 120V @ 60Hz
- Power Measurement and Reporting
- Up to 300W
- Dimmable
- Supports incandescent, halogen, dimmable CFL, and dimmable LED bulbs.
Specifications
- Battery Type: Outlet
- Battery Life: N/A
- Dimension: 2.55″W x 3.17″H x 1.56″L
- Operating Temperature: 0° to 40°C
Installation
This step is applicable to all of the following models.
Centralite 3 Series Lamp Module
Centralite 3 Series Appliance Module
Centralite Azela Lamp Module
Centralite Azela Appliance Module
Step 1: Attach the plug from the lamp or appliance to be controlled into the receptacle of the Lamp/Appliance Module.
Note: Be sure that you are using an appliance module if you are controlling an appliance.
Step 2: Attach Lamp/Appliance Module to wall receptacle. Verify that the receptacle is powered. If the receptacle is powered by a wall switch, the wall switch must be kept ON at all times for the module to operate properly.
Step 3: Pair the Lamp/Appliance Module to your Touchstone system.
Pairing
You can add lights when you activate Touchstone or at a later time. If you want to add a light that was not included with the original Touchstone package, make sure your service provider supports it.
To add lights, click Settings on the tool bar to display the settings menu.
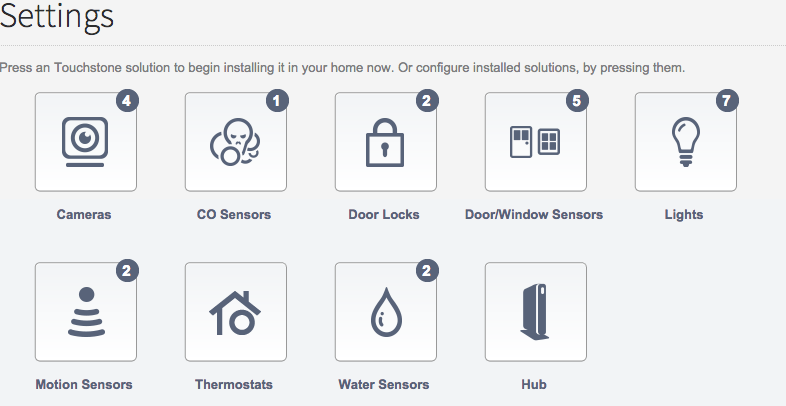
Click lights to display the light setting page.
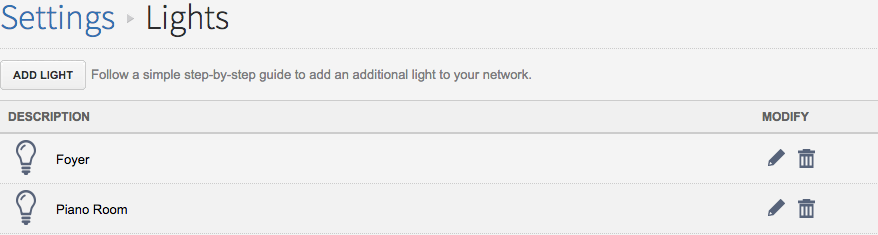
Click Add Light and follow the onscreen prompts.
Resetting
This step applies to the following models:
Centralite 3 Series Lamp Module
Centralite 3 Series Appliance Module
Centralite Azela Lamp Module
Centralite Azela Appliance Module
Verify that the wall outlet is powered. If the wall outlet is powered by a wall switch, then the wall switch MUST be kept ON at ALL times for the Lamp Module to function.
Navigate to your Subscriber Portal and click Settings>Lights>Add A Light to begin the pairing process.
Attach the plug from the lamp or appliance to be controlled into the outlet of the Lamp Module.
Press and hold the Lamp Module button. NOTE: The button for the AZELA models is on the side of the module.
While still holding down the Lamp Module button plug the unit back into the wall outlet. After 2 Seconds the LED will turn on.
Once the LED is on let go of the button. The LED will flash a few times every 5 seconds to signal that it is in pairing mode.